TOOLGAL products combine in-depth metallurgical knowledge, innovative engineering capabilities, wide application
experience as well as flexible and advanced manufacturing capabilities, allowing us to create a wide range of tailor
made solutions for customers around the world.
TOOLGAL’S superior Quality System reduces equipment, material, and human variance factors, ensuring consistent
quality products and processes.
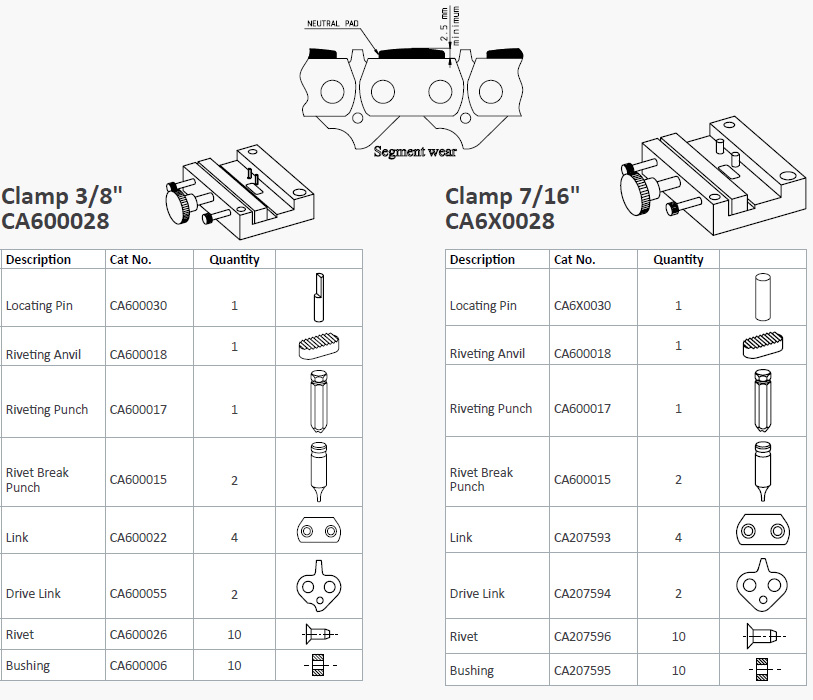
Cut To Size – Custom build your chain according to the amount of links needed
Repair capability – Conveniently fix or replace faulty links
Flexibility and efficient stock management – No need to keep large amounts of various chain sizes in stock. The efficient assembly kit gives you total flexibility to mount a new chain or repair a broken link, where and when you need to
Lower logistic costs –Don’t waste valuable time, receive remote assembly training, repair or replace links on site

- Remove the clamp assembly from the kit.
- lnsert the proper punch: riveting or extracting.
- For extracting, remove the anvil (the toothed part) from the clamp assembly.
- When riveting,the rivet is placed with its head resting on the anvil (on the underside of the chain).
- Place the chain in the clamp, so that the suitable pin is inserted into the hole in the drive link. The chain’s location is according to the particular rivet being treated.
- Close the clamping jaw with the middle (larger) screw to straighten the chain and hold it in place; close with moderate force only.
- Put the clamp assembly, with the chain, in its place in the kit.
- When riveting, lubricate the rivet with a drop of oil for better results.
- Lower the punch down to the rivet with the handlebar (twin levers). Apply pressure to the rivet with a 1/4 turn of the handlebar. Then turn the center handle one or two turns. Repeat the previous actions until the riveting is completed. Attention: Take care not to apply excessive pressure.
- Release the chain when the riveting is completed and make sure that the drive link turns freely around the rivet